How to Create Your Own Ganesh AI Video Using ChatGPT and Google Flow
Introduction
SCROLL DOWN FOR ALL PROMPTS
AI video-making is an emerging space that enables the creation of unique content in a matter of seconds as compared to traditional video editing. In this guide, we will discuss a simple two-step workflow that can be used to create a personalized Ganesh AI video using your own photo and Ganesh image with ChatGPT and Google Flow.
The workflow is very simple and beginner-friendly and requires the following two steps:
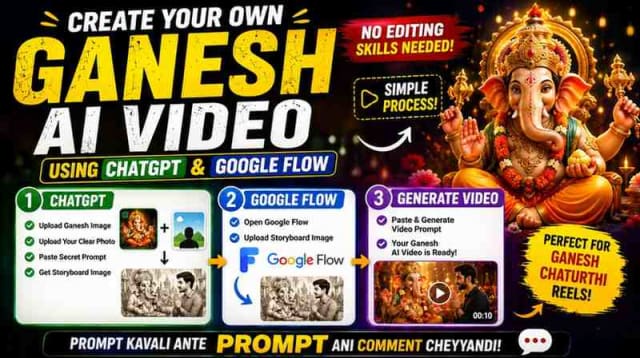
- Upload your Ganesh image + clear photo to ChatGPT and ask to generate a storyboard image using a prompt
- Upload the generated image to Google Flow and use a video prompt to generate a Ganesh AI video
This workflow can be used to create a personalized Ganesh Chaturthi content, Instagram Reels, WhatsApp Status, festival post, and similar AI-generated videos.
Below, we discuss an end-to-end process for creating a Ganesh AI video.
What Is a Ganesh AI Video
A Ganesh AI video is a festive video created using images, prompts, and video AI. Such a video can be created with relative ease by providing the AI with reference images and prompts as compared to conceptualizing and editing a video from scratch.
For example, you can create a Ganesh AI video by combining the following elements:
- Your own clear photo
- Ganesh image
- Prompt for AI
- Storyboard image
- Video prompt
Such a creative task can be interesting for those looking to experiment with video AI.
Why Should You Make a Personalized Ganesh Video
Festive content is highly visual, so an AI video can enable the creation of unique content for your Instagram or YouTube Shorts. This way, you can go beyond static Ganesh images and engage your audience with a personalized story that includes you and the Ganesh icon.
You can customize the concept in terms of:
- Desired look
- Ganesh image
- Background
- Clothing
- Overall appearance
- Lighting
- And other elements
The discussed workflow can be used multiple times with different photos and concepts.
What You Need for a Ganesh Video
Before getting started, make sure you have the following tools and assets:
1. Clear Photo
A clear photo (selfie) where your face is visible. The clearer the photo, the better, as the AI will be able to recognize your image.
2. Ganesh Image
The image of Ganesh that you want to use as a reference.
3. ChatGPT
A ChatGPT account to generate a storyboard image using your prompt and reference photos.
4. Google Flow
A Google Flow account to generate a video from the generated storyboard image and prompt.
5. Video Editor
An optional video editor to edit the generated video (add music, text, effects, and other elements).
Step 1: Pick a Ganesh Image
The first step is to pick a Ganesh image that you want to use for your video.
You can pick between traditional, cinematic, 3D, festive, Instagram Reels-style, and other variations. In general, the more specific you are in your prompt, the better the results will be.
Step 2: Pick a Clear Photo
The second step is to pick a clear photo that you want to use for your video.
Make sure to use a clear photo where your face is visible. Avoid using blurry photos or photos where your face is not visible.
Step 3: Open ChatGPT
Open the ChatGPT website and upload your clear photo and Ganesh image to the AI. Make sure to provide a prompt describing what you want the AI to generate.
Note that you will not ask the AI to generate a video but a storyboard image.
Step 4: Storyboard Prompt
The prompt should describe what you want to see in the image.
For example, you can describe the following:
- What you look like
- What Ganesh looks like
- Where you are
- How the background looks
- The atmosphere and overall feel
- Lighting
- Camera framing
- Festive elements
- And other elements
You can be as specific or as general as you want in your prompt. However, make sure to describe what you want to see in your video.
After you provide the prompt, ask the AI to generate a storyboard image.
Step 5: Review Storyboard
After the AI generates the image, make sure to review it and ensure that it looks the way you want it to.
Specifically, you may want to make sure the following elements are captured:
- You look the way you do in the photo
- Ganesh looks the way you want him to look
- The background looks good
- The atmosphere is as desired
- Other elements are captured
If you are not satisfied with the generated image, you may want to ask the AI to generate a new image using a more specific prompt.
Make sure to be specific in your prompt so that you get the desired image.
After you are satisfied with the generated image, move to the next step.
Step 6: Open Google Flow
After you are satisfied with the generated image, open Google Flow and prepare to generate a video.
Make sure to select the right option if you want to create a vertical 9:16 Instagram Reel or similar content.
The available options will vary depending on your account and Google Flow settings.
Step 7: Upload the Storyboard Image
Upload the generated storyboard image to Google Flow.
As you can see, the image provides a reference for what you want the video to look like. This way, you do not have to rely on a prompt to describe what you want the video to look like but provide a visual reference instead.
Step 8: Add Video Prompt
Add a prompt describing what you want the AI to do with the storyboard image.
Specifically, you can describe the following:
- How characters should move
- Body language
- Expressions
- How the environment should look
- Lighting
- Camera directions
- Atmosphere
- And other elements
As in the case of the ChatGPT prompt, you should aim for a specific and descriptive prompt that describes what you want the AI to do without giving potentially conflicting instructions.
It is worth noting that for a simple 30-second Instagram Reel you do not need to add many complex instructions.
Step 9: Generate Ganesh Video
After you upload the image and add a prompt, the AI will generate a video.
Once the video is generated, make sure to review it and ensure that it looks the way you want it to.
If you are not satisfied with the result, you may want to go back and rework your prompt before asking the AI to generate another video.
Create a 30-Second Ganesh Reel
To create a 30-second Ganesh AI video, you may want to split the video into multiple parts and show how each part is made.
Specifically, you can split the process into three parts:
Video 1 – Hook
You can start by saying something like the following:
Ok Siri, this video is going to be fun because I am going to show you how to create your own Ganesh AI video. Are you ready?
This way, you hook the viewer’s attention and tell them what the video is going to be about.
Video 2 – Image Creation
Explain how you can create the image for the Ganesh AI video:
First, I am going to upload this Ganesh image and my clear photo into ChatGPT and ask to generate a storyboard image using the above prompt.
Video 3 – Video Generation
Explain how you can generate a video using Google Flow:
Then, I am going to upload the generated image into Google Flow and add the following prompt to generate a video. Finally, I am going to add a simple CTA at the end of the video. The CTA could be as simple as the following:
PROMPT.
Why Use a Storyboard Before Video Generation
When you use a video AI generator, it usually relies on a prompt to tell it what you want the video to look like. However, sometimes it can be easier to describe a visual reference first and then ask the AI to recreate it in motion.
Thus, the process becomes simpler:
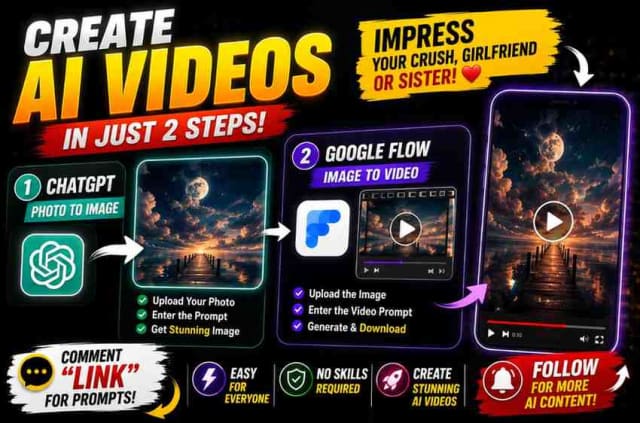
Ganesh Image + Personal Photo → ChatGPT → Storyboard Image → Google Flow → Ganesh AI Video
Thus, you can use a two-step process of image → video to create a compelling Ganesh AI video.
Tips
1. Use Clear Images
Images are often a good starting point for any image generation. Therefore, make sure to use clear and high-resolution Ganesh and personal photos when creating your own Ganesh AI video.
2. Be Specific in Your Prompt
When asking the AI to generate an image or video, make sure to be specific in your prompt.
3. Preview the Storyboard First
Always review the generated storyboard image to make sure that it reflects your desired concept before moving on to video generation.
4. Keep the Prompt for Video Simple
When generating a video, keep the prompt simple and straightforward.
5. Use the Correct Aspect Ratio
When generating a video for Instagram Reels or similar platforms make sure that the aspect ratio is set to 9:16 (vertical) if this option is available.
How to Use the Video
After you generate the Ganesh video, you can use it as:
- Instagram Reel
- YouTube Short
- WhatsApp Status
- Festival Post
- Or other festive content
You can also add music and text to the video using a video editor. When adding text, make sure to double-check the spelling before sharing the video.
Ganesh AI Video Content Ideas
After you learn how to create a Ganesh AI video you may want to experiment with different concepts.
Below are some ideas for creating such content:
- Traditional Ganesh theme
- Cinematic Ganesh theme
- Personal Ganesh Chaturthi AI video
- 3D Ganesh theme
- Transforming Instagram Reel into a Ganesh AI video
These are just a few ideas, but you can also come up with your own unique concept.
Common Mistakes
Below are some common mistakes to avoid when creating Ganesh AI videos:
Using Blurry Photos
Using blurry photos when generating a video is a bad idea because it will be challenging to get good results.
Skipping the Storyboard
Make sure to always use a storyboard as a reference when generating a video.
Asking to Do Conflicting Things
When providing a prompt, make sure not to use instructions that ask the AI to do conflicting things.
Not Reviewing the Final Video
Always review the generated video to ensure that everything is in order before publishing or sharing the video.
Adding Too Many Effects
When editing your Ganesh AI video, avoid adding too many special effects and unnecessary elements that can distract the viewer from the main subject.
Frequently Asked Questions
Can Beginners Create a Ganesh AI Video?
Yes, this is a simple project that involves using prompts, references photos, and a video AI tool.
Can I Use My Own Photo?
Yes, in fact, you are encouraged to use your own photo to create a personalized Ganesh AI video.
Do I Need Video Editing Skills?
No, you do not need any video editing skills to create a Ganesh AI video.
Can I Create a Vertical Instagram Reel?
Yes, if possible, make sure to use a 9:16 aspect ratio when generating a vertical Instagram Reel.
Can I Create Multiple Ganesh Videos?
Yes, you can experiment with different Ganesh images, personal photos, environments, themes, and prompts to create multiple videos.
IMAGE
PROMPT
✨ AI PromptGenerate one ultra-realistic cinematic documentary 3×3 vertical storyboard (9:16) showing the complete chronological making process of a Ganesh idol using two reference images. Image A is the sculptor reference and must remain identical across all panels, preserving the exact face, facial proportions, skin tone, hairstyle, beard, clothing, accessories, body proportions, hand appearance, and working posture. Image B is the final Ganesh idol reference and the final panel must match it exactly, preserving the face, trunk direction, eyes, four arms, crown, halo, throne, jewelry, ornaments, colors, clothing, decorative details, and proportions. Create exactly 9 equal panels separated by thin white lines with no text, captions, numbers, logos, or watermarks. Maintain the same traditional Indian idol workshop, worktable, background, camera angle, camera height, lens, lighting, and perspective throughout all panels. Panel 1: raw clay preparation. Panel 2: rough clay foundation. Panel 3: body and throne shaping. Panel 4: head and trunk sculpting. Panel 5: face refinement with realistic expressions. Panel 6: four arms and hand gestures completed. Panel 7: crown, halo, jewelry, ornaments, and intricate carvings completed while still unpainted. Panel 8: painting in progress with visible brush strokes and partially painted surfaces while raw clay remains visible. Panel 9: final devotional reveal matching Image B exactly, decorated with marigold flowers, oil lamps, and subtle incense smoke. Style: ultra-realistic photography, authentic Indian sculptor workshop, warm golden cinematic lighting, shallow depth of field, photorealistic skin, natural clay texture, realistic sculpting tools, volumetric lighting, HDR, editorial documentary quality, fine clay imperfections, dust particles, 8K, museum-grade realism. Negative Prompt: no identity changes, no redesigned idol, no extra or missing limbs, no anatomy errors, no floating objects, no workshop changes, no lighting changes, no camera changes, no fantasy styling, no cartoon, no CGI toy appearance, no duplicate sculptor, no duplicate idol, no morphing, no inconsistent chronology, no text, no logos, no watermarks, no early final reveal.
VIDEO
PROMPT
✨ AI PromptUpload Image A (Sculptor Reference), Image B (Final Ganesh Idol Reference), and the generated storyboard. Use the storyboard only as a chronological guide. Generate one continuous 10-second ultra-realistic cinematic documentary time-lapse video in 9:16 vertical format inside a traditional Indian idol workshop. Preserve the sculptor from Image A exactly, including face, facial proportions, hairstyle, beard, clothing, accessories, body proportions, hands, and posture throughout the video with no identity changes. Preserve the final Ganesh idol from Image B exactly, including face, trunk direction, four arms, eyes, crown, halo, throne, jewelry, ornaments, colors, clothing, decorative details, and proportions. Use one continuous locked tripod shot with no cuts, scene changes, zoom jumps, or camera rotation, allowing only a subtle cinematic push-in. The clay naturally transforms through these stages: raw clay preparation, rough foundation, body and throne shaping, head and trunk sculpting, facial detailing, four arms sculpted, crown, halo, jewelry and ornaments carved, painting begins with realistic brush strokes while the idol remains partially painted, and finally the completed Ganesh idol is revealed only during the last second, matching Image B exactly. Show realistic sculpting techniques, natural hand movements, believable clay deformation, carving, smoothing, detailing, authentic painting, airborne clay dust, warm workshop ambience, shallow depth of field, volumetric lighting, HDR, photorealistic textures, documentary cinematography, and premium 8K realism. End with a devotional atmosphere featuring marigold flowers, glowing oil lamps, gentle incense smoke, and warm golden lighting while holding the final reveal briefly. Negative Prompt: no identity changes, no redesigned idol, no extra or missing limbs, no anatomy errors, no floating objects, no morphing artifacts, no camera jumps, no workshop changes, no unrealistic painting, no fantasy effects, no cartoon style, no CGI appearance, no text, no logos, no watermarks, and no early final reveal.
dinxsh7
EditorEditorial contributor researching practical guides, tech discoveries, and curated recommendations for Dinesh Picks.
Continue Reading